Sunday, July 24, 2016

Basil as a houseplant: growing basil indoors all year round

And...we're back!

It's been about a year since I hung up this blog, but my green thumb is back.

For the time being, I figured I'd take a break from the hydroponics and go back to container gardening. There are a number of interesting products out there, from brand new Aerogardens (I see that AeroGrow has released the "Bounty" that contains nine pods, 24 inch extendable arm and full spectrum LED which looks really intriguing) to a relatively new player called Click and Grow, to some interesting products such as this aquaponic garden from Back to the Roots where you can raise both herbs and fish! Still no word from NIWA, but I assume they're still working on their offering as well.

At some point I'll see if I can scrounge up the $$ to get these to review them, but in the meantime I thought I'd go completely old school. No hydroponics, no aeroponics, no aquaponics, just growing basil as a houseplant.

Now it wasn't that long ago that I had more basil than I knew what to do with. You remember those days--I was making margherita pizza and caprese salads and pesto and basil ice cream and everything else I could think of.

Well, I was a little basiled out after a while, but recently I had a craving again for margherita pizza, so at a local farm stand I bought a bunch of it, freshly picked from the farms on Long Island. But then my wife made the mistake of putting the basil in the refrigerator (a no-no), and within a day it was ruined--black, soaked, and mushy.

And so I went to the local supermarket. There were bunches of cut basil from New Jersey and I picked up another bunch. I harvested about 20-30 leaves to use for a pizza, and another 10-20 to use for a caprese salad, but there were dozens of other leaves remaining. This time we didn't put it in the refrigerator, but even so within 24 hours they were shriveled since they didn't have a water source.

And so just like that we were out about $7. But luckily in both cases I had the foresight to save a couple stalks to basil and root them.

Growing basil from cuttings is one of the easiest things you'll do,
  1. Take a fresh branch of basil with lots of healthy looking leaves.
  2. Strip off the leaves at the bottom. This is important because any leaves that fall below the water line are going to grow bacteria
  3. Fill a clean, empty bottle with lukewarm water.
  4. Cut the bottom stem of the basil at an angle, under running water.
    |
  5. Place it in the water, again making sure that only stem and no leaves are below the water line.
  6. Fill the water every few days. Your basil will be thirsty and drink up a lot of water.
  7. Pretty soon you'll see little roots growing out, just like it looks to the right.
Congratulations, it's time to transplant them!

To transplant them, just take a houseplant pot, fill it about 3/4 of the way with regular potting soil. Pour a little water in to mix it into clay (think back to making mud pies as a kid) and then dig a little hole.


Put the plant into the pot so that the newly formed root ball is fully covered. 


If you're putting more than one plant, make sure they're spaced out enough so both have room to grow.


Fill the rest of the pot with dirt, and water it, covering enough of the stem to ensure that the plant is stable, will be able to take root, and won't fall over. You may need to try this a few times, as whenever you add water the loose soil will shift, Don't worry too much about over-watering at this stage--remember that the plants just came from a 100% water environment. Just like a baby needs to adapt from amniotic fluid to solid food, your plant needs to acclimate itself to its new home.

Place it in a sunny window and make sure to water it every few days. Some of the leaves might wilt or die because of the shock, but basil is especially resilient and as long as the stalk is thick and green your leaves will come.


Congratulations! You're the proud owner of a new houseplant. And the next time you need a little or a lot of basil, you can go right to your window to pick it. In fact, all of the tips I've shared in the past apply here. Prune it often (even if you don't need the basil, prune it anyway), and make sure to prune from the top and cut the plant just above where one stalk splits into two. 

I'd suggest keeping them separate from other houseplants until you're 100% sure there aren't any little critters sneaking a ride--as we've seen, once fungus gnats, spider mites or aphids discover herb plants, the plants don't have much of a chance, if not of surviving then of being able to be served at the dinner table.

From time to time you'll need to fertilize, just use regular Miracle Gro plant food.

As much as I love hydroponics, the nice thing about going "old school" like this is that you don't pay for electricity, for grow lights, for seed pods, or anything like that. And instead of dumping unused basil in the garbage, I'm keeping it alive so that the money I spent on the original basil will end up paying for itself over and over again. As long as you remember to water them and feed them, they'll serve you for a very, very long time.

Friday, July 31, 2015

So long...for a while

Sorry that my posts in 2015 have been so sporadic, but it's for pretty good reason. In August, I have another "little sprout" coming. It's our first baby and she'll be a little girl. And so the time I'd otherwise spend tending to my plants, I'm going to be using to tend to her.

So, a lot of folks have been asking...whatever happened to the strawberries? Well, after my last post a few months ago I did have a few more harvests, but the strawberries never quite got as prolific nor as big as I'd hoped. I think this is just a natural drawback of AeroGarden's "grow bowl". The roots of the plants can't grow deep, so they just kind of spread around the shallow bowl. As such, the plants never quite felt anchored or stable.

What did my strawberries in, though, were the critters, Having an open bowl with organic plant material and water is like putting out a welcome mat for all kinds of bugs, including our old friend the fungus gnats. After a while it just wasn't worth it anymore.

And so that's it for now. I've packed my Aerogardens away for the time being, but don't worry, I'll be back. I still have my houseplants that I'll be writing about from time to time, and as new hydroponic technology hits the scene such as the NIWA, I'll definitely post about it here.

See you in a bit :)

Wednesday, June 17, 2015

Indoor Herb Gardening Tips: Growing 101 for Basil, Rosemary, Parsley, Thyme, Oregano, and Mint

I used to maintain a site called IndoorHerbGarden.org, but I decided to retire it and focus all my effort on this blog. This is a page that I was especially proud of, as it represented the culmination of all my years of indoor herb gardening. Enjoy :)


Tips for growing Basil indoors 
basil leaves
  • Basil plants hate the cold. Keep them in a warm place, preferably in full sunlight. 
  • Cut the plant from the top--this will encourage new growth. Just snip off the top stem right above where it meets four sets of leaves below it. The four sets of leaves will grow and become the top of the plant, ready for harvesting. 
  • If you see flowers form, snip them off. This will improve growth of the plant and improve the flavor. 
  • Harvest and prune often, even if you don't need it right away. The more you harvest, the more it'll grow. 
  • Basil can be freezed. Just put individual basil leaves in a freezer bag, and store it in the freezer. You can take it out any time. 
  • Basil can't be refrigerated directly. If you need to store them for a short period of time, drop them in a glass of water and put that in the fridge. That will last you a few days. 
  • Cut off flowers as soon as you see them appear. This will keep your plant producing and keep the leaves savory. 
  • Watch out for aphids. 
  • Favorite recipes: Margherita Pizza, Chicken and Basil, Pesto 
Tips for growing Rosemary indoors 
sprig of rosemary
  • Keep Rosemary constantly moist, but never, ever let the roots be oversaturated or sit in water. The best policy is to look at your container's drain holes--if the dirt is damp, there's no need to water. Let the soil dry out between watering, but of course, don't let it stay dry for too long. Rosemary must be in a well-drained container. 
  • 6-8 hours of full sun is important. 
  • Make sure your room has good air circulation. 
  • Repot at least once a year, as the soil will lose its nutrients over time. 
  • Rosemary can be frozen in small freezer bags. 
  • Watch out for aphids and spider mites. 
  • Favorite recipes: Herb butter, grilling meat, foccacia. 
Tips for growing Parsley indoors

parsley leaf
  • Parsley makes a great breath freshener. It's great to chew on, for example, after eating a dish with too much garlic. 
  • Parsley also is very rich in Vitamin A and Vitamin C, as well as calcium and iron. 
  • It grows best in full sun. 
  • Parsley is ready to harvest once its leaves begin to curl and when it's produced stems with three segments. Harvest the larger leaves at the outside of the plant first just above ground level, and allow the newer interior shoots to mature. This will encourage faster growth. 
  • Parsley comes in two varieties: curly leaf and flat leaf. The flat leaf variety is preferred for cooking and chopping due to its stronger flavor and ease of handling. 
  • Pick parsley early in the day when the oils are strongest. 
  • Watch out for aphids!
  • Favorite recipes: garnish, stuffing, soup, tabouli, sauce. 

Tips for growing Thyme indoors
sprig of thyme
  • Thyme is one of the easiest herbs to grow. It's best to plant them in loose and fast-draining soil which is not very fertile. 
  • Thyme can be grown as an herb or as an attractive and fragrant plant due to their beautiful little purplish-white flowers. They can actually repel some harmful insects from your other plants due to their fragrance. 
  • To harvest, just snip leaves off as needed. 
  • To dry thyme for storage, harvest sprigs in the early autumn, tie them together, and hand them upside-down in a warm, well-ventilated, and shady area. You can store the dried leaves in a container with a tight lid. 
  • Favorite recipes: flavoring sauces, fish, meat dishes, soup and stews. 
Tips for growing Oregano indoors 
oregano leaves
  • As oregano plants start to flower, pinch off the flower buds. This will help the plants grow and will improve the flavor. 
  • Pick the leaves early in the morning for the best taste and aroma. 
  • Start harvesting when plants are about eight inches tall and have at least a dozen leaves. Just pinch the leaves off the plants and cut back the plant about three inches once you have harvested all the leaves. 
  • Oregano will produce a stronger flavor if you do NOT add fertilizer to the plant. 
  • Oregano is not as easy as other herbs to grow indoors. You should have a grow light on it at least 12 hours. Be sure NOT to overwater it--only water when the soil is dry. 
  • Favorite recipes: Anything Italian! Spaghetti sauce, pizza, meats, stews, stuffing, and breads.
Tips for growing Mint indoors 
mint leaves
  • Crush or chop prior to use--this brings out the flavor.
  • Mint is a great herb to grow indoors, as it is extremely hardy. 
  • Prune frequently for optimal growth. Clip stems liberally to shape plants and keep fresh new leaves coming on. 
  • New leaves are the best for cooking. 
  • Favorite recipes: Mint julep and other tall, cool drinks! Desserts, sauces (particularly for lamb), and jelly. Try tossing some mint leaves into hot chocolate or black tea! 

Sunday, May 10, 2015

Rubber Plant (Ficus robusta) - Best Air Purifying Plant #9

Once there was a silly old ant.
Thought he could move a rubber tree plant.
Everyone knows an ant. Can't.
Move a rubber tree plant.

For some reason, every time I look at my Ficus robusta, #9 on our air cleaning plants list, this song pops into my head. Now technically a "rubber tree plant" is a Ficus elastica, which can grow up to 50  to 100 feet tall (which an ant definitely can't move). The Ficus robusta is a variety of this species bred specifically to serve as an ornamental plant. Commonly called a "rubber plant", this ornamental plant was bred to have broader, stiffer, and more upright leaves than its gigantic cousin.

I looked for a very, very long time to find a plant like this. I ended up going to the annual plant sale at the Brooklyn Botanical Garden, one of our local gardens, and even then I got the second to last one on the first day of the sale. People love these.

If you're looking for one you might have some luck finding a plant on Amazon, a number of sellers are selling both the Elastica and the Robusta. Either one makes a nice houseplant.


This species of plant is native to Asia, including India, Nepal, Malaysia, Indonesia, Bhutan, Burma, and parts of China. It's actually not used to make commercial rubber, at least not anymore, although there was a time that the creamy, sticky substance in the leaf was used for that purpose, and the name stuck. The leaves can get pretty big, upwards of 10 inches long and 5 inches wide if you let it.

It's important to keep the soil of a rubber plant moist--if it becomes dry the plant will interpret this as a dry season approaching and start to shed some of its leaves.On the other hand, you don't want to water it too much or the leaves will turn yellow. That said, a little overwatering and underwatering are fine, as the plant is very forgiving.

When new leaves grow, it makes for one of the most beautiful plants in the house with its thick, sturdy leaves. This plant rates 9 out of 10 for removing chemicals in the air.

Care Tips

1) Ensure that the plant is in a place where it gets bright indirect light throughout the day. Some direct sunlight in the morning is fine.

2) Water the plant thoroughly and let it dry out partially before you water it again.

3) Wash the leaves from time to time with a clean, wet cloth.

4) Use a well-draining potting soil.

5) Repot every 36 months

Wednesday, April 8, 2015

Alternative Aerogarden Sponges and Pods to Grow Your Own Veggies and Herbs

For the last few years I've been growing everything in my Aerogarden--herbs, strawberries, tomatoes, peppers, flowers, It's been a great experience, but one frustrating thing to me is that all too often the price of the replacement seed pods and its are sometimes so expensive that they wipe out any cost savings I might have gotten by growing my own plants indoors.

So something I've started doing is growing my own seeds.

Aerogarden sells its own complete set of grow sponges, grow domes, grow baskets, and grow labels on Amazon for over $55.00. It's the most complete set you can get, but it comes at a price. You get 50 replacement pods but the price comes out to over $1 a pod (without seeds). You can also buy their Grow Anything Kit that comes with enough for 5 pods and liquid plant food for a little over $10 (again, convenient but more than $2 a pod)

If you're the type of person who just wants to get it done and don't mind paying a little extra for convenience, this is a great kit to get. On the other hand, if you're like me and a little more frugal (read: cheap), here's way you can save a ton of money and achieve the same results.

First, be sure to SAVE your plastic grow domes when you use an Aerogarden seed kit. It's tempting to throw them away once your plants outgrow them, but throw them in a drawers.

Second, once you've retired an old Aerogarden crop, throw away the growth sponge which likely has is filled with roots by now. But save the the grow basket and sanitize it using hot water and soap. If the label is still in good shape you can save that as well, but if not it's easy enough to achieve the same effect (which is to keep the seeds dark and hydrated while germinating) using a little piece of aluminum foil or a thick piece of paper cut to fit.

Then, you need to buy replacement grow sponges. AeroGarden sells a pack of 50 of those for $17.95, as well as a pack of 70 plus liquid plant food for $24.95. There's also a seller who sells alternative pods for $5.99 for 25, but when you factor in shipping costs you're only saving $2,36, so I'd go with the Aerogarden brand.

By doing a little recycling, you can get your per-pod cost down to only 36 cents a pod, plus keep just a little more plastic out of the landfills.

Finally, you need to go out and get seeds. Since you have a lot of pods to play with now's your time to experiment. You're going to want to find plants that grow from a single stalk and don't get too big too fast. The consensus out there is that these types of plants will enjoy the most success:

  • Herbs (of course)
  • Lettuce
  • Tomatoes
  • Peppers like bell peppers and jalapeno peppers
  • Leafy greens like kale, spinach, arugula, watercress, and Swiss chard
  • Cucumbers
I'd also add peas and beans to the list. Woody plants (like rosemary) won't work, nor will plants that spread (like strawberries) unless you use the Grow Tray with the organic coconut material--but after my strawberry experience I don't think I'm going back to that for a while.

If you're in the market for seeds, a perennial best-selling vendor on Amazon is Zziggysgal, who sells organi certified non-GMO seeds, including a set of 12 herbs (Italian Parsley, Thyme, Cilantro, Sweet Basil, Dill, Oregano, Sweet Marjoram, Chives, Summer Savory, Garlic Chives, Mustard, and Culinary Sage), all of which will do great in an Aerogarden.

They also have another set of 12 veggies. If you have a tall Aerogarden, the ones that'll grow best indoors are Red Bell Pepper, Golden Yellow Tomatoes, Snap Peas, Cherry Tomato, Lettuce, and possibly Zucchini. They also include in the set Yellow Squash, Spinach, Bush Beans, and Beets which will probably be best grown outdoors or in a container garden. Or you could do both--grow your crops outdoors but experiment with indoor gardening so you'll have fresh crops throughout the winter.

You can get replacement plant food on Amazon as well that'll last you for a good long time and will do wonders whether you grow herbs or veggies.

The fun of it is in the experimentation. Try everything and see what works :)

Tuesday, March 10, 2015

Alternative Aerogarden Nutrients - Liquid and Dry Plant Food

With the exception of a class of plants called Epiphytes which are able to extract nutrients from the air, rain, and debris around it (like cacti, orchids, and bromelaids), most plants derive their nutrients from their root systems and the soil. So when a plant grows hydroponically, something needs to take the place of the rich nutrients usually found in soil.

Back in the old days, some of you might recall that Aerogarden used to include white tablets in with their new seed pods. These tablets usually came in a small zip-lock bag. The tablets appeared to be made of salt (they were actually made of a combination of mineral salts, seaweed, a pH balancing tap water buffer, and a binder to hold the tablet together).

To use them, you just plopped two pill into the water. Plop, plop, fizz, fizz.


The problem with these tablets was that because they were moist, over time, these tablets would burst out of their zip-lock bags and seep into the outer box and generally cause a mess. Worse, over time your water would be filled with gunk, which could even clog up the Aerogarden pumps.

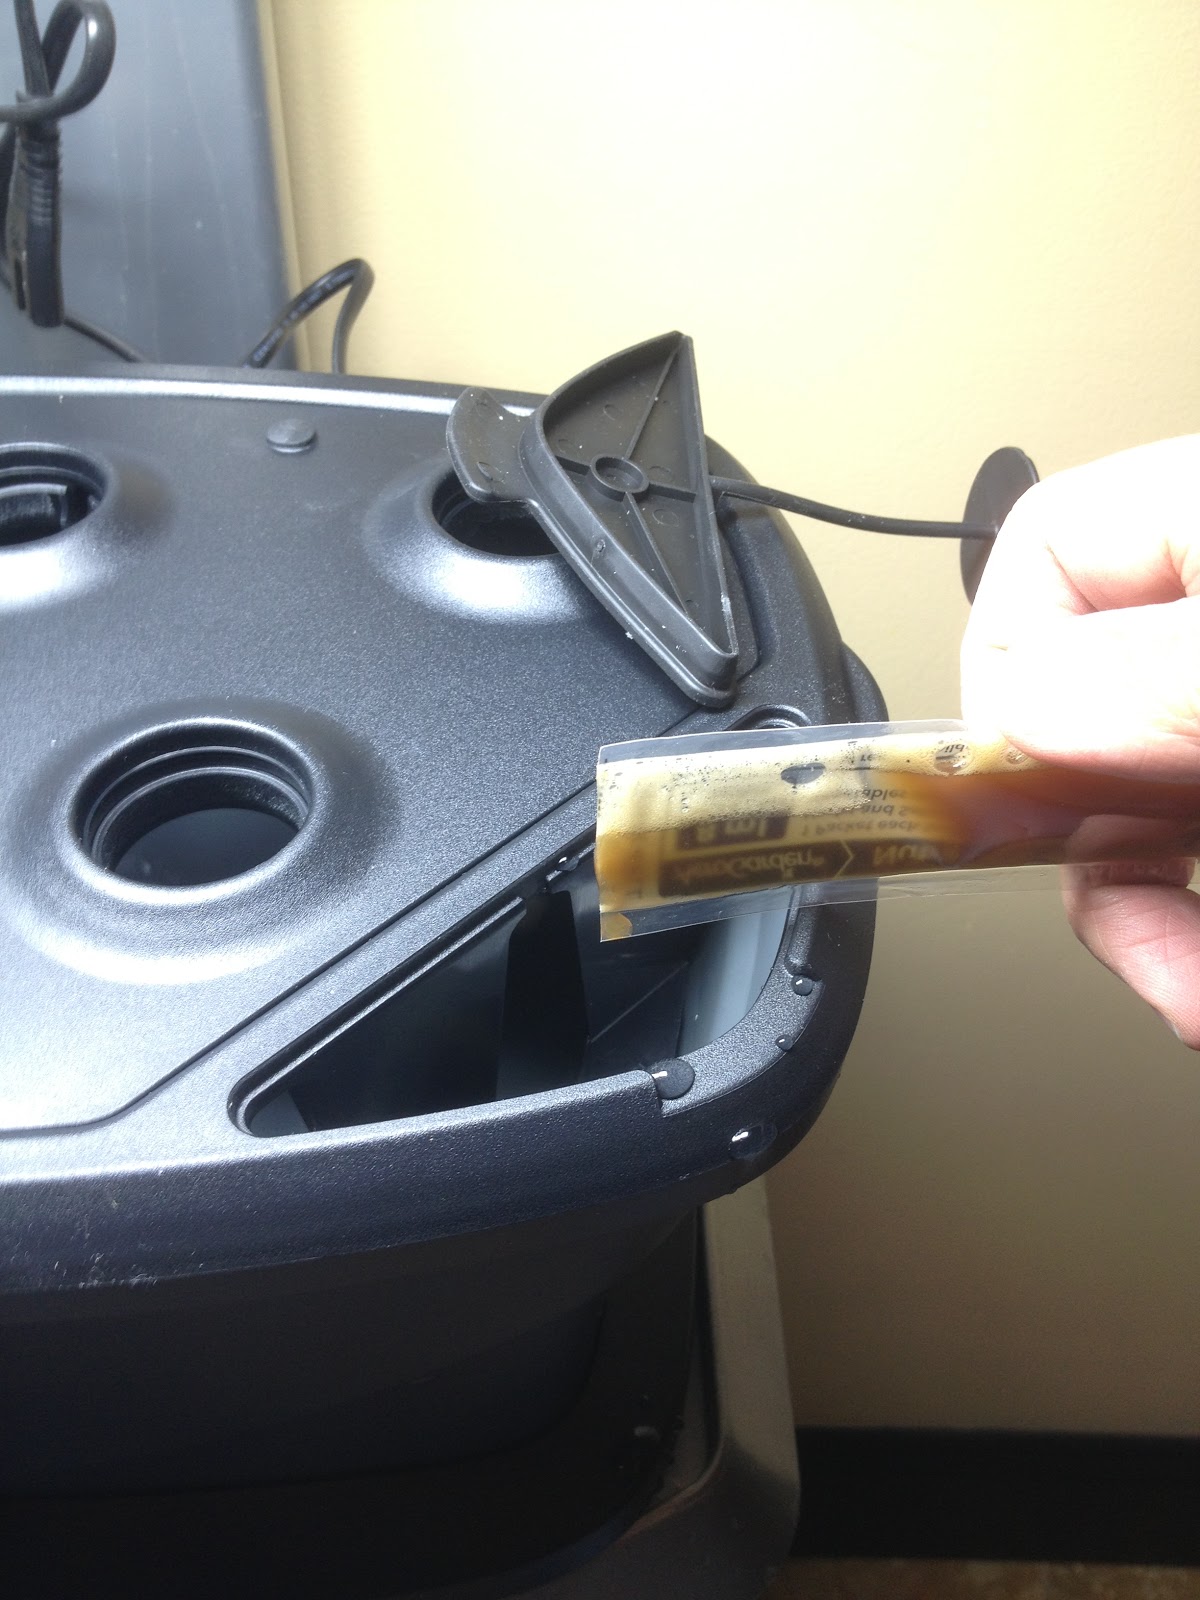
The good engineers at Aerogrow then came up with little plastic packets, similar to soy sauce or duck sauce packets you get at Chinese takeout restaurants.


These worked great, but it rubbed me the wrong way how wasteful this solution was--the last thing our landfills need is more plastic. Worse, if you kept the packet more than a few months, they would dry out, leaving you with a pack of dried salt and brown gunk.

I should say these were salvageable. Here's what I did with dried out Aerogarden nutrient packets: just cut them into a few pieces with scissors, put them in a cup of water, and stir. The salts and nutrients will dissolve into water and be just as good as new. But yes, this was a pain.

The latest, and so far the best, solution now is that Aerogarden provides bottles of liquid plant food. Here's what the container looks like from Aerogarden's catalog (next to a fictional set of strawberry crowns).


 Like a bottle of cough syrup, it comes with a cup that you can measure and pour.

Aerogarden also sells nutrients in bulk. Here's a one quart container you can get from their store or from Amazon:


The container will last for more than 100 feedings.While they used to provide different formulations for different types of plants, nowadays they provide pretty much the same nutrients for all plants.

Whether they're in tablet, packet, or bottle form, AeroGarden's own nutrients are made up of a number of mineral salts, including potassium nitrate, calcium nitrate, mono potassium phosphate, ammonium nitrate, and magnesium sulfate. While this sounds like a chemical concoction, all the ingredients occur naturally and are balanced in just the right amounts to help plants thrive (some of these ingredients are also found in multi-vitamins). You can actually use it as nutrients for your Aerogarden, or if you dilute it with water, you can use it for your houseplants or outdoor garden as well.

At 29 cents a feeding, the nutrient is kind of pricey, though. A question I hear a lot is, are there alternatives to the Aerogarden nutrients?

The first thing to understand is--normal plant food (like Miracle Gro's traditional blue crystal plant food for houseplants) is NOT a suitable substitute for Aerogarden's liquid plant food because this kind of food is designed to work with soil--just putting it in water won't provide the pH balance or micronutrients your plants need. You do need to go with a solution designed specifically for hydroponics.

One of the leaders in the category is General Hydroponics, and a lot of people have reported success with a product called MaxiGro. This is a dry product that you mix with water. A 2.2 pound package can make about 200 gallons of nutrient solution. Assuming this equates to 266 feedings (an Amazon reader said that "two small scoops" were enough per feeding), that comes out to about 5.8 cents a feeding, which is a lot more affordable than Aerogarden.

If you prefer liquid nutrients, General Hydroponics' signature product is their Flora Series. These are a set of 32 ounce bottles that meet a variety of needs. You can read the reviews on Amazon to see others' experiences with them and Aerogardens--consensus is that you just need to mix less than their suggested dosage to see great results. With both the solid and liquid nutrients, you'll need to do a little trial and error to get to what's right for your plants.

Have you had success with alternatives to Aerogarden's nutrients? Share them here!

Monday, February 9, 2015

Happy belated 2015! Here's where we are with the strawberries!

Sorry, it's been a while since I've posted an update about my Aerogarden Strawberries. Lots going on in my life (don't worry, all good stuff), so keeping this blog up has been put a tad on the back burner. But rest assured, I'm still doing the indoor gardening, and I'm still documenting every step of the way so that you can share in my joy...and my misery :)

Honestly, you didn't miss much. I haven't bought any new air cleaning plants since my last post on the subject (sadly, the Areca Palm and the Gerbera Daisy both met their maker, but the others are doing quite well), Just when I thought my fungus gnat problem was gone at home and work, suddenly there was a whole new infestation--and this time Gnatrol didn't help (Unlike last time, the Amazon seller I bought it from this time gave it to me in a plastic baggie, and I have a sneaking suspicion that they're using an old batch. To their credit they agreed to refund my money, no questions asked--but watering the plant with an impotent tablespoon of Gnatrol just made the problem worse.

Ah, now to the strawberries. Here, you didn't miss much either. Since the last post, there was only one strawberry--one--that survived.

Now as you recall, one of my "dreams" was to grow enough indoor strawberries to make my own shortcake. Well, I have the "short" down right anyway. As in, I'm short of the number I wanted.

But it's been a learning experience. I pretty conclusively figured out that everything I said last November was on the mark, except perhaps for the temperature one. Specifically...

1) I'm not watering enough. Far and away, this is my #1 problem. I have gigantic, huge green leaves which are soaking up the light--and soaking up the water. I mean literally, I might go two days and find the reservoir almost completely dry. And what looked like a beautiful white flower a few days ago is just a dried up little stump, because the strawberry didn't have enough water to grow. So now, I literally am watering every single day.

2) I'm letting dead leaves overstay their welcome. I noticed a phenomenon where older leaves would turn brown. Turns out this is perfectly normal, and the best thing to do is the prune the leaves by cutting the stem near the root. This prevents the dying leaf from hogging up the resources, and gives a chance for new growth. Similarly, I've noticed that some of the crowns produce fewer and fewer leaves and then just stop growing. I've taken those out to make more room for the healthy ones.

3) I'm not pollinating enough. Aerogrow's instructions are to give the plants a "good shake" to pollinate them, but I've seen to many instances where the flowers give way to scrunched up, misformed fruits. I decided to make like a bee, take a Q-Tip, and go from flower to flower. That's helped a lot.

4) I'm not feeding right. Admittedly, I've let the unit go without a proper feeding for too long from time to time. Being fastidious about feeding is critical for plants staying healthy.

5) Those *%%^@#& fungus gnats. I find that they've gotten into the Aerogarden too. The good news is, the ones that have matured freak out every hour the upper basin start filling with water, and so I can vacuum them up with my Dyson handheld. I put a yellow trap that seems to catch them too. I'm not sure how many of the larvae can survive the continual cycle of watering and drying, but so far the plants seem to be winning.


Well, lo and behold, just doing these things a little more carefully has resulted in a sudden influx of flowers. In this picture you can see all the stages that happen when strawberry plants grow--you start with a white and yellow flower, then the white petals start to fall off and the middle yellow part (the stamen) starts to bulge and look like a tiny green strawberry. If all goes well, in a few days it'll get bigger and bigger, and finally start turning pink and then red.


This is a strawberry that looks like it wasn't pollinated quite right...you can see it all scrunched up and not ripening as quickly as its high-achieving sibling.


On the other hand, this is one that I deliberately and carefully hand-pollinated from the time it was just a small flower. 


Again, here you can see some of its siblings, one still in flower form, while the other a tiny berry already. 


So, the time came to harvest my second successful Aerogarden strawberry. Here's what it looked like inside, again pretty much a perfect strawberry.


The strawberry was again amazingly juicy and really, really sweet.  I mean, this didn't need any sugar or cream--it was bursting with strawberry flavor.

My only regret is that in three months, I only have two strawberries to show for it. So my dream of building a victory garden that would sustain me in my apartment if I were to be snowed in or Y2K were to hit...that'll still have to wait. But at the very least, here's hoping that all those flowers you see in the picture above will yield at least enough for me to make a strawberry shortcake cupcake :)


Sunday, December 7, 2014

The first strawberry

My first "real" strawberry, after a string of stunted and shriveled ones, came in December.

Here's what it looked like on December 4.


Notice that on the same vine, its sibling never grew more than a few millimeters in diameter before it shriveled up.

And here's what it looked like three days later on December 7.


Slicing it open, it was a perfect strawberry through and through., juicy and sweet.


Wanting to savor the moment, I actually sat down and sliced it, eating it like a steak and savoring every little bit. At this rate, I may enjoy one strawberry every few months, so I figure I'd make the most of it.

Tuesday, November 25, 2014

Peace Lily (Spathiphyllum sp.) - Best Air Purifying Plant #7

Granted, I can't say the name of this plant without sounding like Sylvester the cat, but it is one of the most popular houseplants around. Its Latin name is Spathiphyllum, where "spatha" refers to the "spathe" (which I'll describe below) and "phyllum" means "leaf".

The plant is also called a "Peace Lily", which is a bit of a misnomer because this plant isn't a lily at all. In fact, the white thing that everyone thinks is a flower is a special kind of leaf, or bract, called a "spathe".  It's more like a shield that protects the hard part in the middle of it, which is the actual flower cluster.

Here's the one I got from Garden World:


The flowers inside the spathe actually had a wonderful subtle fragrant scent. When I tapped them they also spewed out a whole bunch of white pollen powder.

It's rated 8 out of 10 for chemical removal and 8 out of 10 for transpiration, thanks to those lovely huge green leaves. Just having it around instantly brings life to a room, both in terms of the beautiful white spathes as well as the cleaner air.

When you buy one of these plants, you want to make sure you go to a breeder or garden center. Word is that when they're mass produced, they're bred so that when you buy them you see nice huge spathes in the store, but once those die, they never come back.

The Spathiphyllum comes from the tropical rainforests of South America. While the plant is known to tolerate low light conditions, this plant loves light. It also prefers a soil mixture that's looser and more porous, like orchid potting soil or a mix of potting soil, peat moss, and perlite, rather than just traditional potting soil that turns into thick mud when wet. It also loves lots of water. Keep the soil damp but not soggy and you should be fine.

I had an old Spathiphyllum for years and it was a testament to how much abuse this plant can take. My plant would go for weeks without watering, to the point where the leaves would start to droop. But after watering it, the leaves would perk up as good as new. I was proud of my plant, but one particularly dry winter I left for a three-week trip and came back to find it not just drooped, but the leaves dried out. I tried watering it, and bless its heart it tried to come back to life, but ultimately it no longer produced flowers nor spathes. Ultimately I had to throw it out, although I did save two cutting from it before I did.

1) Temperature: As with any tropical rainforest plant, keep as warm and humid as possible. Keep between 68-80 degrees Fahrenheit. Anything below 55 and they will have problems.
2) Sunlight: Light to moderate shade is best.
3) Care and feeding: Mist regularly and water frequently in summer. In winter, keep soil damp. Feed weekly in summertime with fertilizer.

Tuesday, November 18, 2014

Boston Fern (Nephrolepis exaltata "Bostoniensis") - Best Air Cleaning Plant #1

With chemical removal rated at 9 out of 10 and transpiration rate at 9 out of 10, the Boston Fern (Nephrolepis exaltata) is the top air cleaning plant on the list. Here's the one I got from Garden World, all transplanted in its nice new pot.


The Boston fern isn't from Boston and quite honestly doesn't even grow particularly well in Boston. There are varying theories of why this variation got the name. The species of Nephrolepis exaltata normally has erect fronds, but this variation of Nephrolepis exaltata cv. Bostoniensis has arching fronds. Some say that the name came when this mutation was discovered as plants were shipped from Boston to Philadelphia in 1894, while others say the name came from Florida pioneer John Soar, who shipped some of the plants to a friend in Boston. Whatever the origin, the name stuck and this plant is forever associated with Boston.

The plant is really native to humid forests and swampy areas, such as in Florida Central and South America, and Africa. Its ability to thrive in humid areas is what makes it a great air cleaning houseplant, as it is used to taking in water and transpiring it. It's that same property that makes it a bit difficult to care for, especially in rooms that we keep climate controlled and dehumidified.

There are a couple things you can do to let your plant feel a little bit more at home. Make sure to place the pot on a tray of pebbles; this way, when the water in the tray dissolves, it'll help hydrate the plant. Also, you'll want to mist the plant once or twice a week. It's not sub-Saharan Africa, but it's close enough. If you see the leaves turning yellow, it's time to increase the humidity.

You'll also want to make sure your soil NEVER dries out. This is not to say to keep it soaking, but if the soil dries out that's not going to be great for the plant.

1) Temperature: Keep between 68-80 degrees Fahrenheit. Anything below 55 and they will die
2) Sunlight: Partial shade and indirect lighting is best. Think the ground of an old growth forest.
3) Care and feeding: Keep soil evenly moist but not soggy. Does not need a lot of fertilizer, feed once or twice a month with a diluted houseplant fertilizer.

Thursday, November 13, 2014

A great garden center in Flushing and Bayside - Garden World

Now most of you who read the blog know that aside from a few links on the side, I don't do a lot of advertising. Part of it is because I do it for the love of indoor gardening, but another part is that I get so sick of bloggers who just seem to sell out with every other post being "sponsored".

That said, when I find a place I really love, I gotta talk about it. And this place is Garden World in Flushing, New York. I should start off by saying that they don't know I'm blogging about them, but I was plenty impressed with them that I figured I'd write a post on them. By the way, if you're in the NY area, there's a Groupon you can use to get a discount.

The shop itself looks pretty nondescript on the outside, just a shack sitting to the side of an H-mart. Walking in, though, you immediately see a huge area filled with supplies. They just started to put up the Christmas products as well, so there's a festive feel about it. There were also fresh apples in the back from area orchards.

The part I wanted to see was in the back--the greenhouse. This was stocked full of wonderful, healthy plants. For someone who's been buying dead and diseased plants from a K-mart under Penn Station, I was like a kid in a candy store.


They had most of the plants we've been talking about--huge golden pothos plants, dracenas, and plenty of other tropical plants. 


The proprietor of the store couldn't have been nicer to us. I read, in broken Latin, the plants I was looking for and he walked me through and showed them to me. I wanted a Bamboo Palm, but the one they had was way too big for me.


Another goal was to get a ficus robusta (rubber tree plant), but the 8" one they had was just too big for me. But I'll be back to see if I can get a 6" one next spring. 


I was happy to find a lot of the plants I'd been searching for. Clockwise from the upper left below is the Boston Fern (#1), the Peace Plant (#7), the Spider Plant (#26), and a Ficus (#15). You'll be reading more about these in the coming weeks as I transplant them. 


Something else I got? A bag of potting soil which was completely free of fungus gnats. For all the coupons I get from K-mart, one thing I learned is that buying soil or plants from a place like that, no matter how cheap you may think it is, ends up costing a lot more in the long run. 


If you're in the Flushing or Franklin Square areas, definitely check them out. 

Tuesday, November 11, 2014

Lots of dried, undeveloped strawberries--Update on the strawberries

It's been a while since I gave an update of the strawberry plants. Here's what they look like today.


Pretty impressive looking, huh? Out of all the plants I planted, only one didn't grow. Again, nice job by Aerogrow on that third batch.

I wish I could say that by now I've harvested bushels of strawberries and have been making pies, jams, and shortcakes. But alas, I've seen about 10 strawberries so far and they all look something like this.


Shriveled, brown, and looking more like a cluster of seeds than a fruit. There are a couple reasons this is happening:

1) I'm not pollinating right. Strawberries coming out malformed or small are usually due to lack of pollination. I followed AeroGrow's instructions and each time I pass by the plant I dutifully give it a good shake. But it doesn't look like that's enough to really spread the pollen. The other problem is that I sometimes don't even see the flowers until it's too late. I think the next step is going to be for me to pay closer attention to see when the flowers are budding and then use a Q-Tip or an artist's brush to hand pollinate them.

2) I'm not watering right. There have been a couple times I check the water and it's bone dry inside. Between the coco chunks and the amount of water the growing plants suck up so much water, I find that the reservoir dries up much faster than with a regular Aerogarden growth. The Grow Bowl really requires you to constantly fill up with water. But watch out--fill it a little too much and water will spill over the side, a lesson I learned a few times.

3) I'm not adding enough nutrients. Looking at the washed-out leaves, I'm wondering if the plants are lacking nutrients. I've been adding old packets of nutrients from past Aerogardens, but I think it might be time for me to go to the bottle of fresh nutrients that got shipped with the product.

4) The temperature is off. The weather and our heating system has been weird lately, meaning really cold nights and occasional periods where it's really warm. I think that might be affecting the plants as well.

So far, there's only one strawberry that looks like it might have a chance.


Its odd shape is a telltale sign of it not being pollinated well, but at least there's a little meat to it. We'll see if it continues to grow.

Wednesday, October 22, 2014

Turning to Gnatrol (Bti) to get rid of Fungus Gnats once and for all

If you recall, a few months ago I wrote of how Kmart sold me a bag of potting soil with fungus gnats, and soon every plant in my house and office seemed to be infested.

I detailed every single tactic I found to try to get rid of them. I tried drying out the soil, but even after all the dirt was bone dry and the leaves started to wilt, watering seemed to bring back the gnats with a vengeance. I tried sprinkling cinnamon but gnats keep showing up. I bought 100 Yellow Sticky Traps, enough to put and put 1-2 on every single plant. While they do a great job of trapping adults they don't seem to be stopping new larvae (remember that it just take one gnat to get through the perimeter alive to lay 200-300 eggs). Finally, I went to both Gardener's Supply Company and Amazon to buy nematodes; none of them seemed to work the first time around which I attributed to them being fried during shipping. But even when I requested replacements, they didn't work either. Drenching the plants with Hydrogen Peroxide didn't seem to do much either.

No more Mr. Nice Guy. It was time for me to turn to Gnatrol (You can purchase Gnatrol for a reasonable price at Amazon). I've admittedly been resisting this option because I've heard that Gnatrol is a "pesticide", and I wasn't keen on adding "dangerous chemicals" to my plants. After all, the point of growing these plants is for me to clear the air, and the last thing I need is for my plants and soil to be poisoning me.

But that's when I did my research. At first glance, Gnatrol sounds scary. It's a "larvacide" with an active ingredient called "Bacillus thuringiensis subsp. israelensis", or Bti. Did I really want to put bacteria into all my houseplants? I mean, putting live parasites (the nematodes) was freaky enough an idea to get used to. The song "I know an old lady who swallowed a fly" kept ringing through my head.

But after reading more about it, Bti is as close to a miracle fix as modern science has come up with. First of all, what they sell isn't live, viable bacteria; the toxicant that kills the larvae is actually a part of the Bti spore. It was actually discovered in 1976 in Israel from scientists who isolated the bacteria from dead mosquito larvae. It's a substance that's deadly to mosquito larvae (as well as larvae of blackflies, midges, and fungus gnats). Specifcially, Bti releases special protein crystals. When the larvae eat them, the alkaline nature of their digestive system causes these crystals to dissolve and be converted into toxic protein molecules that destroy the inside of the larvae's stomach. Long story short, they can't eat and then they go off to that giant Golden Pothos in the sky.

Here's the cool thing about it--because humans, animals, birds, and fish have acidic and not alkaline digestive tracts, the Bti toxins don't have any effect on us. In fact, Bti is used in mass quantities by cities and municipalities worldwide to control mosquito populations. Because it's a bacteria that's found naturally in soils anyway, there's less fear of using it than more dangerous chemical solutions. Another thing that's nice about Bti is that once it's released, the active ingredient will dissipate after about 72 hours, so even if it were harmful to humans, the exposure is limited.

Gnatrol is a consumer version of Bti. I bought the bottle from a seller on Amazon for $2.69 + $5.49 shipping. Now we all know shipping this tiny bottle can't cost $5.49, but still, if I can spend under $10 and get rid of all the fungus gnats, it'll be money well spent.

The bottle you buy for $10 looks tiny, but because all you need is 1/2 teaspoon per gallon for mild infestations and 1 1/2 teaspoons for heavy infestations, this bottle should last for multiple waterings, hopefully enough to eradicate all the fungus gnats. It has a shelf life of about 2 years, so it doesn't make sense to hoard it--at under $10 it's affordable to get infestation by infestation (which hopefully will be years apart).


To use it, I went a little on the heavy side and added about 2 tablespoons to a gallon of water and drenched the soil, When you mix the water and the granules, you end up with basically a bottle full of bacterial gunk, which looks like brown water.


I then went plant by plant, watering it so that the soil was thoroughly moist and a little bit drained on the bottom.


For a few plants where I thought there were no fungus gnats, a few gnats flew out when I watered them. Hopefully this will put an end to them once and for all. I put a fresh set of yellow sticky traps over each plant to see how effective the treatment will be.


So far, I'm cautiously optimistic. While I'd typically see 10-20 (or more) gnats on the sticky traps, a lot of them are clear now, or have 1-2 gnats. They do say to re-apply the solution three times a week. This is because Gnatrol will not affect adult flies after the pupae stage, so if some adults decide to lay more eggs you'll have a fresh batch of Bti for their young ones to feast on.

If you look at the Amazon reviews, most of them are glowing, but some of them complain that the Gnatrol only made the problem worse. In these cases, the likely culprit is that the seller sold them really old granules that were no longer potent, so ironically while they were thinking they were filling the soil with Bti, they just ended up re-watering the soil, creating more fungus, and making it a breeding ground for gnats.

In my case, though, the gnats definitely appear to be finally getting under control. Since I did this about two weeks ago, the number of gnats definitely appear to have lessened both at home and in the office. The biggest test was on the Boston Fern from Kmart that had been infested from day one. The infestation for that had gotten so bad that I enclosed it into two sandwich bag, partially to serve as a greenhouse, but partially because there were so many gnats coming out of this plant it was clear that the roots were thoroughly infested. It sounds a little nasty, but every morning I'd see new gnats buzzing around in the bag and then squash them.


This was ground zero in the war against the gnats. As you can see, the plant is barely larger now than it was many months ago; this is almost certainly due to the gnat larvae feeding at the root. I think what kept the plant fighting was putting it in the bag, where it got ample humidity (something that ferns need).

My first instinct after writing about this plant so many months ago was to toss the plant in the trash, but I felt that would be conceding victory to the gnats. No, I was going to fight this. So I did everything I mentioned in my last post on fungus gnats, to no avail. But I have it a good drench in the Gnatrol which finally seems to be doing something. I still see and squash one or two gnats every few days, but the problem seems to be a lot more under control. My hope is that eventually I'll go weeks without seeing one gnat, and then I'll finally be able to properly repot and fertilize this plant and hopefully see it grow again. It's honestly hard to say if it's too late for this little guy, but fingers crossed.