Showing posts with label replacement aerogarden parts. Show all posts

Wednesday, April 8, 2015

Alternative Aerogarden Sponges and Pods to Grow Your Own Veggies and Herbs

For the last few years I've been growing everything in my Aerogarden--herbs, strawberries, tomatoes, peppers, flowers, It's been a great experience, but one frustrating thing to me is that all too often the price of the replacement seed pods and its are sometimes so expensive that they wipe out any cost savings I might have gotten by growing my own plants indoors.

So something I've started doing is growing my own seeds.

Aerogarden sells its own complete set of grow sponges, grow domes, grow baskets, and grow labels on Amazon for over $55.00. It's the most complete set you can get, but it comes at a price. You get 50 replacement pods but the price comes out to over $1 a pod (without seeds). You can also buy their Grow Anything Kit that comes with enough for 5 pods and liquid plant food for a little over $10 (again, convenient but more than $2 a pod)

If you're the type of person who just wants to get it done and don't mind paying a little extra for convenience, this is a great kit to get. On the other hand, if you're like me and a little more frugal (read: cheap), here's way you can save a ton of money and achieve the same results.

First, be sure to SAVE your plastic grow domes when you use an Aerogarden seed kit. It's tempting to throw them away once your plants outgrow them, but throw them in a drawers.

Second, once you've retired an old Aerogarden crop, throw away the growth sponge which likely has is filled with roots by now. But save the the grow basket and sanitize it using hot water and soap. If the label is still in good shape you can save that as well, but if not it's easy enough to achieve the same effect (which is to keep the seeds dark and hydrated while germinating) using a little piece of aluminum foil or a thick piece of paper cut to fit.

Then, you need to buy replacement grow sponges. AeroGarden sells a pack of 50 of those for $17.95, as well as a pack of 70 plus liquid plant food for $24.95. There's also a seller who sells alternative pods for $5.99 for 25, but when you factor in shipping costs you're only saving $2,36, so I'd go with the Aerogarden brand.

By doing a little recycling, you can get your per-pod cost down to only 36 cents a pod, plus keep just a little more plastic out of the landfills.

Finally, you need to go out and get seeds. Since you have a lot of pods to play with now's your time to experiment. You're going to want to find plants that grow from a single stalk and don't get too big too fast. The consensus out there is that these types of plants will enjoy the most success:

  • Herbs (of course)
  • Lettuce
  • Tomatoes
  • Peppers like bell peppers and jalapeno peppers
  • Leafy greens like kale, spinach, arugula, watercress, and Swiss chard
  • Cucumbers
I'd also add peas and beans to the list. Woody plants (like rosemary) won't work, nor will plants that spread (like strawberries) unless you use the Grow Tray with the organic coconut material--but after my strawberry experience I don't think I'm going back to that for a while.

If you're in the market for seeds, a perennial best-selling vendor on Amazon is Zziggysgal, who sells organi certified non-GMO seeds, including a set of 12 herbs (Italian Parsley, Thyme, Cilantro, Sweet Basil, Dill, Oregano, Sweet Marjoram, Chives, Summer Savory, Garlic Chives, Mustard, and Culinary Sage), all of which will do great in an Aerogarden.

They also have another set of 12 veggies. If you have a tall Aerogarden, the ones that'll grow best indoors are Red Bell Pepper, Golden Yellow Tomatoes, Snap Peas, Cherry Tomato, Lettuce, and possibly Zucchini. They also include in the set Yellow Squash, Spinach, Bush Beans, and Beets which will probably be best grown outdoors or in a container garden. Or you could do both--grow your crops outdoors but experiment with indoor gardening so you'll have fresh crops throughout the winter.

You can get replacement plant food on Amazon as well that'll last you for a good long time and will do wonders whether you grow herbs or veggies.

The fun of it is in the experimentation. Try everything and see what works :)

Tuesday, March 10, 2015

Alternative Aerogarden Nutrients - Liquid and Dry Plant Food

With the exception of a class of plants called Epiphytes which are able to extract nutrients from the air, rain, and debris around it (like cacti, orchids, and bromelaids), most plants derive their nutrients from their root systems and the soil. So when a plant grows hydroponically, something needs to take the place of the rich nutrients usually found in soil.

Back in the old days, some of you might recall that Aerogarden used to include white tablets in with their new seed pods. These tablets usually came in a small zip-lock bag. The tablets appeared to be made of salt (they were actually made of a combination of mineral salts, seaweed, a pH balancing tap water buffer, and a binder to hold the tablet together).

To use them, you just plopped two pill into the water. Plop, plop, fizz, fizz.


The problem with these tablets was that because they were moist, over time, these tablets would burst out of their zip-lock bags and seep into the outer box and generally cause a mess. Worse, over time your water would be filled with gunk, which could even clog up the Aerogarden pumps.

The good engineers at Aerogrow then came up with little plastic packets, similar to soy sauce or duck sauce packets you get at Chinese takeout restaurants.


These worked great, but it rubbed me the wrong way how wasteful this solution was--the last thing our landfills need is more plastic. Worse, if you kept the packet more than a few months, they would dry out, leaving you with a pack of dried salt and brown gunk.

I should say these were salvageable. Here's what I did with dried out Aerogarden nutrient packets: just cut them into a few pieces with scissors, put them in a cup of water, and stir. The salts and nutrients will dissolve into water and be just as good as new. But yes, this was a pain.

The latest, and so far the best, solution now is that Aerogarden provides bottles of liquid plant food. Here's what the container looks like from Aerogarden's catalog (next to a fictional set of strawberry crowns).


 Like a bottle of cough syrup, it comes with a cup that you can measure and pour.

Aerogarden also sells nutrients in bulk. Here's a one quart container you can get from their store or from Amazon:


The container will last for more than 100 feedings.While they used to provide different formulations for different types of plants, nowadays they provide pretty much the same nutrients for all plants.

Whether they're in tablet, packet, or bottle form, AeroGarden's own nutrients are made up of a number of mineral salts, including potassium nitrate, calcium nitrate, mono potassium phosphate, ammonium nitrate, and magnesium sulfate. While this sounds like a chemical concoction, all the ingredients occur naturally and are balanced in just the right amounts to help plants thrive (some of these ingredients are also found in multi-vitamins). You can actually use it as nutrients for your Aerogarden, or if you dilute it with water, you can use it for your houseplants or outdoor garden as well.

At 29 cents a feeding, the nutrient is kind of pricey, though. A question I hear a lot is, are there alternatives to the Aerogarden nutrients?

The first thing to understand is--normal plant food (like Miracle Gro's traditional blue crystal plant food for houseplants) is NOT a suitable substitute for Aerogarden's liquid plant food because this kind of food is designed to work with soil--just putting it in water won't provide the pH balance or micronutrients your plants need. You do need to go with a solution designed specifically for hydroponics.

One of the leaders in the category is General Hydroponics, and a lot of people have reported success with a product called MaxiGro. This is a dry product that you mix with water. A 2.2 pound package can make about 200 gallons of nutrient solution. Assuming this equates to 266 feedings (an Amazon reader said that "two small scoops" were enough per feeding), that comes out to about 5.8 cents a feeding, which is a lot more affordable than Aerogarden.

If you prefer liquid nutrients, General Hydroponics' signature product is their Flora Series. These are a set of 32 ounce bottles that meet a variety of needs. You can read the reviews on Amazon to see others' experiences with them and Aerogardens--consensus is that you just need to mix less than their suggested dosage to see great results. With both the solid and liquid nutrients, you'll need to do a little trial and error to get to what's right for your plants.

Have you had success with alternatives to Aerogarden's nutrients? Share them here!

Saturday, October 4, 2014

Alternative to Aerogarden's Rinse and Refill Siphon

It's now been over a week since I planted the "new" plants from Aerogarden, and I don't see one speck of green. I fear that yet again, what Aerogrow calls "dormant" plants is really just a bunch of dried out twigs with no life in them. I'll give it a few more days before calling them, but they really, really need to work on their quality control. In the meantime, the one plant that is growing is still doing well.

I've had to refill the water tank a few times. It's a little tricky, because you definitely don't want to fill it when the pump is running, but even when the pump is off you need to be careful to keep slightly below the fill line, or you'll get water all over (and who knows, this might short out the ULTRA yet again).

One phenomenon you notice very quickly when growing Aerogarden Strawberries (or anything in the Grow Bowl) is that the more the bowl fills up and drains with water the gunkier the water gets. Here's a picture of how brown the water is after 2-3 weeks of filling and draining.


Even in a regular Aerogarden, the water can get really gunky and disgusting. And it's a pain to drain the water, especially when the plants are huge and the roots are heavy. As I've shown you in the past, you need to carry the whole thing to the sink, gently lift the plants off without breaking the roots, drain the water, refill it, and set everything back.

Aerogarden does suggest you siphon it and drain it (and conveniently, they sell a product called the "Rinse and Refill Siphon". While I'm usually a big fan of Aerogarden's products (I bought everything from an Oxygen Booster Kit to a Herb 'n Serve Salad Dressing Maker to a Master Chef Herb Guide to ice trays), the Amazon reviews for the Rinse and Refill Siphon are not very promising. They use words like cheap, flimsy, air leaks, and others.

One reviewer very helpfully posted a link for alternatives to Rinse and Refill Siphon in the Automotive department. Admittedly, there's a part of me that feels more comfortable ordering Aerogarden-branded products (which is why I'm their perfect customer--for years I didn't think twice about ordering a light bulb for $12 until I realized there were alternatives).

In this case, I took the reviewer's advice and ended up buying this TRDP14 Siphon Manual Hand Liquid Transfer Pump based on its great reviews.


For $4 shipped, it was a lot more economical than the $12.95 Aerogrow wanted. I tried it out and it worked like a charm.

First, you need to get a bucket, or in my case a gallon milk container. Next, you close the screw valve on top of squeeze bulb. Put the end of the long straight white tube into the place where you fill the Aerogarden with water.

Next, give a few squeezes until the liquid is flowing. Assuming you're holding the pump at the right angle, gravity will take over and the water will flow from the Aerogarden through the flexible tube into your bucket.


Slurp up as much of the water until it's empty. At any point you want to stop (say, if your bucket is getting full), you can open the twist valve to break the siphon, stopping the flow.

Use care removing the siphon device, giving time for the remaining liquid to drain out of both tubes. Last thing you want is for brown gunky water to get all over the place.

Finally, you can dump your old water into the sink or toilet and refill your Aerogarden with fresh water and nutrients.

I'd highly, highly suggest getting this product instead of the one that Aerogrow sells, as it's cheaper, easier to handle. I was debating whether to get the smaller red one of the bigger blue one, but for purposes of the Aerogarden the red one is perfect.


Tuesday, September 9, 2014

Aerogarden Strawberry Kit - Can you Really Grow Strawberries indoors?

If you've been following this blog you know I've grown just about everything there is to grow in an Aerogarden (at least legally). I've gone through herbs, tomatoes, lettuce, cabbage, peppers, and flowers. In short, I've been a sucker every time Aerogrow decides to release something new.

With my Aerogarden Ultra back in action I decided to do something I wanted to do for a long time--send away for the Aerogarden Strawberry Kit. Now for years people have been experimenting with strawberry plants in the Aerogarden with limited success. I'm not sure the exact reason, but my guess is that it's because strawberries are really tough to grow from seed, so the best way to grow them is from cuttings which are rooted in an actual soil.

But recently, Aerogrow designed a new system that lets you root plants in an actual growing medium. And not surprisingly, the first kinds of plants they released were strawberries (although according to their site, their system also supports plants like orchids, bonsai, dwarf fruit trees, miniature roses, and more).

I'd love to try some of those other kinds of plants at some point, but because this would be my first experience I sent away for the Aerogarden Strawberry Kit, which I assume has the best chance for success.

The package arrived in the mail about a week after I ordered it using a service called "UPS SmartPost". This is where UPS delivers it to my local post office and the post office delivers it to me. What this usually means is an extended delay by the time the package gets to me, a fact that will become relevant as you read on.

Opening the box revealed a bunch of new plastic parts. It took me a while to figure out how they all go together, but once you realize how it's engineered you'll find that it's an ingenious way to "extend" the Aerogarden.

You actually have to do some minor surgery on your Ultra to make it work. Here's what you need to do:

1) Take your existing grow bowl and remove the top cover (with the holes to plant the seed pods in), and put it aside. You won't be needing it.


2) In the box is a smaller bowl that fits snugly on top of your main grow bowl. This is what's going to contain the growth medium, which I'll describe below.

3) You need to go into your big grow bowl and remove the long tube that sticks out of the pump. Again, put it aside as you won't be needing it, but you'll need it whenever you decide to convert your Aerogarden back to its original state.


Then, you'll replace it with a shorter tube that they provide you.


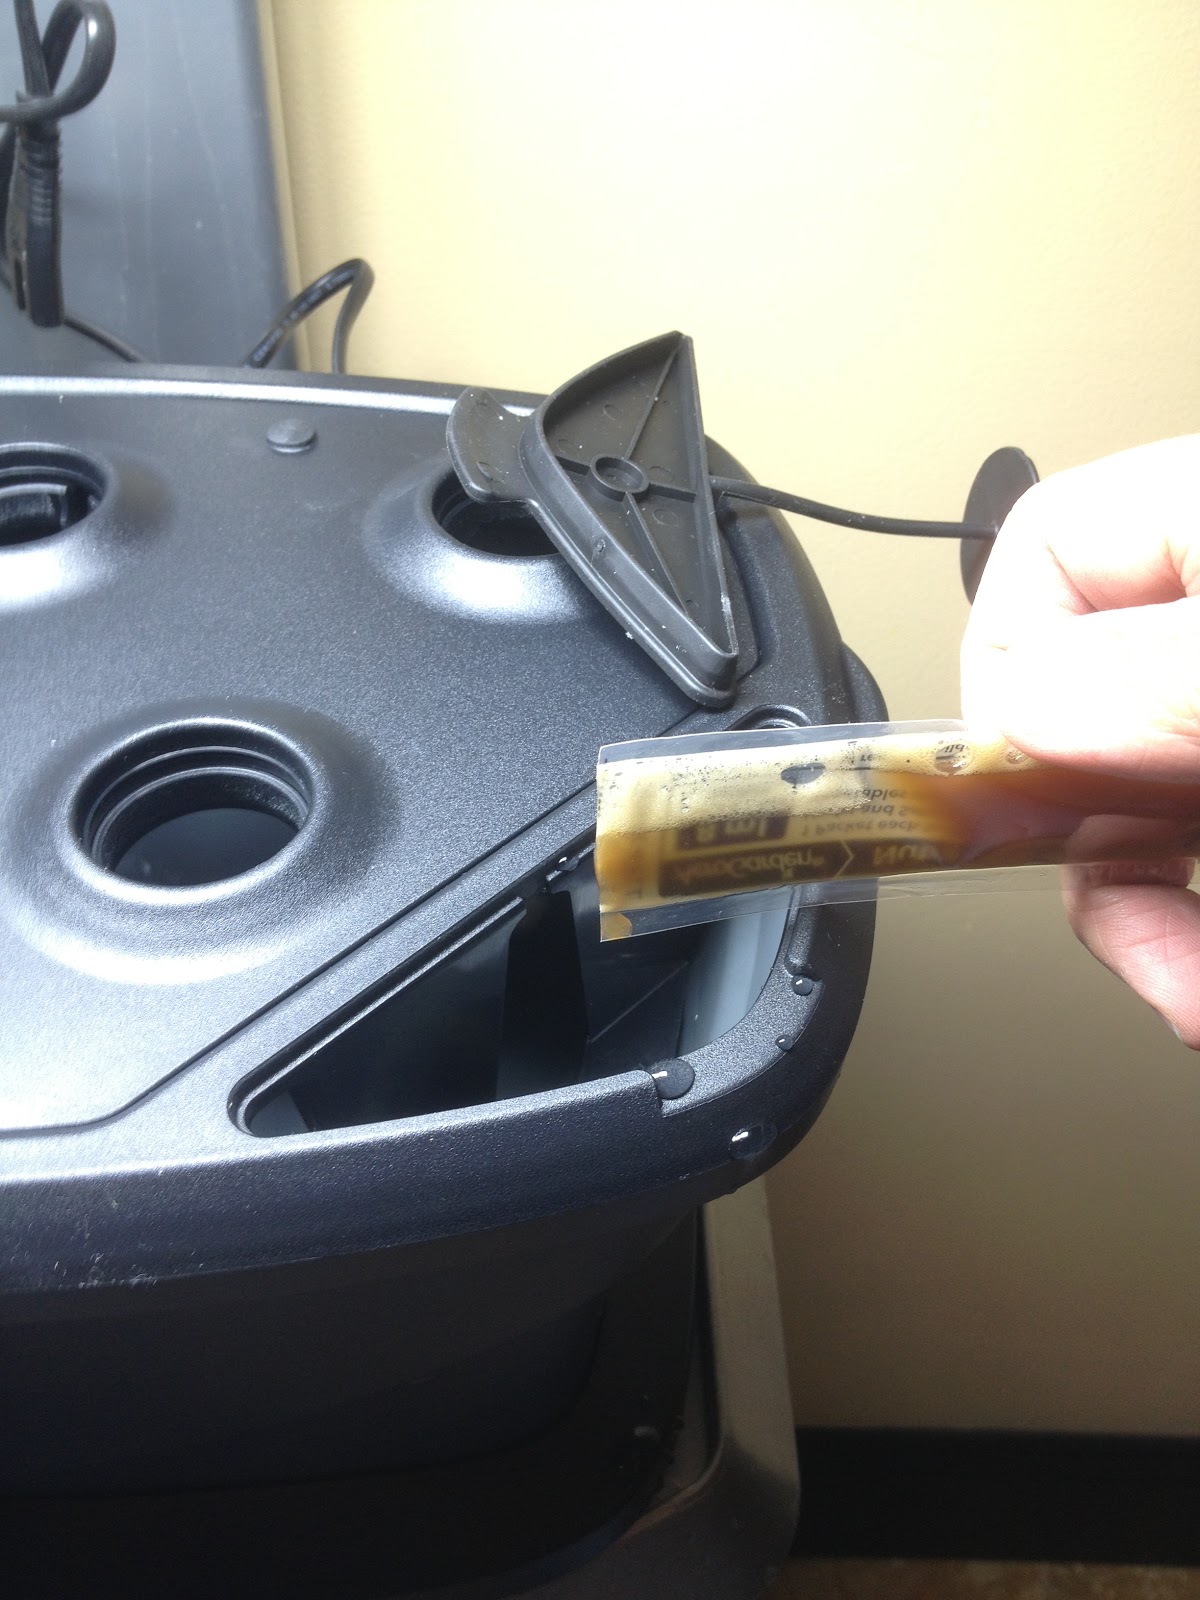
You then fit a plastic drain and "inlet nozzle" to the upper bowl


And then put the two together by putting the small bowl over the large bowl.


Here's what it'll look like, with the drainage plug in place. 


4)  You get two bags of growth medium. It's not soil, but something called "Chunk Coco Grow Media". If you don't want to use their growth medium, you can also use other media like aquarium gravel, perlite, or hydroton. Chunk Coco Grow Media looks like a bunch of wood and twigs broken into pieces the size of croutons. It turns out this is coconut fiber (basically chopped coconut shells) which turns out to be an ideal growing medium because it provide support for growing plants, provides sufficient oxygen, drains much more quickly than soil or sand, and is a renewable resource (no guilt throwing this in the trash).


You fill your bowl with this coconut fiber (the two bags they provide are more than sufficient to fill the bowl and have some left over). Prior to using it, you need to soak them in water to hydrate and expand them. This turned out to be a much more difficult exercise that I thought it would because as it turns out, wood floats. So I would follow the instructions and fill the plastic bag the coconut fiber came in with water only, only to see them float on top of the water and pop out. I figured out after a while that I just had to fill the bag halfway, tie the end of bag to seal it, and let the wood soak the water in that way.


Once your wood is soaked the rest of the process is pretty simple. You just pour it into the smaller bowl, and this will be where you plant your plants.

5) You also need to configure the computer for the AeroGrow Ultra. One thing I missed in the instructions is that you first have to set up using "Quick Plant" and choosing the cycle for "Flowers".


Then, you need to go in and modify the behavior of the pump so that every hour it pumps for two minutes and then it goes off for the other 58 minutes.

By setting the Aerogarden this way, your plants essentially get "rewatered" every hour when the water is pumped out of the lower bowl into the upper one. It's a rather clever way of simulating a hydrated fertile piece of ground. If you plant something other than strawberries, you'll need to experiment with different watering cycles--plants that like drier environments like orchids or bonsai may need only 2 minutes a week!

6) The next is planting. Unlike previous Aerogarden sets, you don't get a seed pod with the Strawberry kit, but actual live plants. Or so it's supposed to be. I think because I had my package delivered on a hot summer week using UPS SurePost (when these packages sit in warehouses for days at a time), what I got didn't look a lot like live plants.

Here's what I expected to see, photo courtesy of the Aerogarden Web site:


And here's what I got:


As bad as it looks in the picture, it looked worse in real life. It was just a clump of brown twigs and dirt that looked pretty dry and brittle. I could see that maybe two plants had the slighted hint of green in them, but the others were so dry they practically disintegrated when I touched them. In fact, a few had fuzzy mold growing on them.


The package was supposed to have "ten plants", but for the life of me I had a hard to finding ten after trying to separate the dirt, dried roots, twigs, and dust.

I called AeroGrow and the woman there insisted to me that they were in a "dormant state" and that I should try planting them anyway. After a little bit of back-and-forth, she was kind enough to agree to send me a new set of plants, but I could tell from her voice she was skeptical. She said a new batch was on its way, but why don't I try planting them anyway and seeing what happens?

And so I did. To plant them, you basically have to put them root side down (again, it was a little tough telling which side was the root), push the coconut fiber aside, and basically cover all but a small portion of top of them with the medium.


Here's what they looked like planted.


I'm going to predict that maybe two of them are going to grow, but I'll bet dollars to doughnuts the rest won't. But to Aerogarden's credit, they'll be sending me more plants.

If you're interested in buying your own Aerogarden Strawberry Kit, bear in mind that first you need an Aerogarden ULTRA or ULTRA LED (it won't work with other kinds of Aerogardens, even tall garden ones due to the shape of the bowl and the type of pump).

If you have one of those, all you need to the AeroGarden Site, click on "Seed Kits" in the top navigation (even though these are plants, not seeds), and search for "Aerogarden Grow Bowl and Strawberry Kit" (for the entire kit) or "Strawberry Crown Kit" (for just the plants).


Wednesday, November 20, 2013

Cheap alternative for Aerogarden grow lights - Adapters for regular light bulbs

I have to admit, one of the things I find most annoying about the Aerogarden is that the grow bulbs seem to blow out on a regular basis, and worse, the only way to get replacements is to go to Aerogarden's store.


Here's the problem--just one of these light bulbs easily cost upwards of $10-13. It's a clever way for Aerogarden to get themselves a regular source of revenue, sort of like the way Gillette never made money on its razors but on the razor blades. But for someone like me who wanted to get into indoor gardening partially to save money, it really doesn't make sense for me to be raving about how I save money by not buying fresh herbs, but end up paying triple the amount I would have paid in electricity and replacement bulbs.

Now for years I've been fastidiously buying from the Aerogarden Store, but when one of my grow lights decided to fail lately, I decided to bite the bullet and try one of these adapters I've been seeing on eBay. They look like this:


Here's how it works. You take a regular CFL or LED light bulb, the same kind you use around the house, and screw it into the adapter.


Then, you plug the adapter right into the Aerogarden. Note that certain light bulbs are going to be too big to fit, but the ones I happened to have lying around fit perfectly.


Voila--instead of shelling another $13 for a new light bulb from Aerogrow, I ended up using a $1.42 light bulb. While Aerogrow will tell you that its lights are "specially formulated to maximize growth", I haven't noticed any difference between the bright light that the Aerogarden grow light is putting out vs. the one that the regular light bulb is.

For your reference, Aerogarden replacement lights typically produce 1450 lumens of light and use 26 watts, so you'll want your CFL or LED bulb to output about the same.

One thing to keep in mind is that depending on what model of Aerogarden you have, you'll need to choose between two types of light bulb sockets.

Most Aerogardens that have three lights except for the Ultra, including the original Aerogarden Extra (not the "Miracle Gro" branded Aerogarden Extra), Aerogarden Extra Elite, VeggiePro, Elite+, Pro200, Deluxe, and Deluxe Upgrade Kit) use a light bulb that has more of a flat end, with two metal prongs coming out of it parallel to the shape of the light (model #100633).

Aerogarden Light 100633

All other Aerogardens, including the AeroGarden 3, AeroGarden 6 (a.k.a. Space Saver and Space Saver Elite), AeroGarden 7 (a.k.a. Classic), AeroGarden Ultra, and new Miracle-Gro-branded AeroGarden Extra use a bulb that has a more round end, with two metal prongs coming out of it perpendicular to the light (model #100629 or 100340).

Aerogarden Light 1000629 or 100340
Where to get them

Obviously, Aerogarden doesn't sell these on their store, but a good place to go is eBay. Just search for "aerogarden adapter" and you'll find sellers selling them for about $10-14 each; the price has gone up a little since I first wrote this post, but it's still a bargain considering the savings you'll get over time. As with everything on eBay, make sure to check that the seller has a good history and great reviews, and make doubly sure that you have the adapter for the right model. The seller I used, whom I was very happy with, doesn't seem to carry them anymore, but there are certainly plenty of others that do. Just make sure you're buying the adapter that lets you use regular light bulbs in the Aerogarden, not the adapter that lets you use Aerogarden bulbs in a regular light socket.

Now obviously this isn't sanctioned by Aerogarden, so chances are if you have a warranty on your product using one of these would probably invalidate it if they were to find out. On the other hand, if you're like me and have already sent hundreds of dollars of your hard-earned money to them, these little adapters are a great way to keep your gardens running. 

Tuesday, February 22, 2011

Replacing the Arm on an Aerogarden 7 or Aerogarden Classic

In my last post and also back in 2009, I posted some information on how to purchase a replacement arm for the Aerogarden 7 or Aerogarden Classic (newer versions of the Aerogarden have an improved design where this is not required). I'm still waiting for the shipment from my last post, but in the meantime I still have the second arm I ordered two years ago, which I'll use to refurbish one of my black Aerogarden Classics. To buy a replacement arm, just go to The AeroGarden Store. You can get the arm in the color of your Aerogarden unit, whether Black, Silver, or White (unfortunately, since writing this post original they seem to have taken these parts off their catalog, but it's still worth trying to contact customer service and see if they can sell this to you for your out-of-warranty Aerogarden).

Just a recap: if you have an Aerogarden where you see white gunk forming on the copper contacts between the basin and the arm, you may need a replacement arm. This gunk is called copper oxide, and while it looks like the white residue you may see elsewhere on your Aerogarden from the nutrient tablets, it's actually a chemical reaction between the contacts and oxygen.

The first step is to remove the lamp and hood from the unit. This is as simple as raising the arm and popping it out of the arm attached to the base. A part of the arm will come with it. 


The new replacement arm comes wrapped in plastic.


...and comes with both the inner and outer parts. Separate the parts. We'll actually be using only the fat outer arm and not the thin inner arm (unless your existing inner arm has some damage, it'll save a lot of time just to keep using it). 

Next, remove the old, chubby arm from the base by pressing the plastic tab on the bottom in and popping the arm out. Unless you're sentimental about such things, you can toss it out (I harvested the screws, as they can be useful for when you replace other parts on the Aerogarden like the pump. 


Pop the new arm in until you hear a snap. 


One last optional thing you can do is to cover the contacts with vaseline. This will help prevent copper oxide forming the next time around. 


Use a moist cloth to clean the hood and the base, which probably has some white gunk (the residue from the nutrient tablets).

Voila! You have a brand new Aerogarden again. 


When I replaced the basin on the unit, the pump still wasn't running. It's then that I realized that I had a lot of copper oxide on the pump contacts as well.

There was always the option of buying a replacement pump, but I figured I'd try to see if the pump was still working and just blocked by the contacts. I used the trick of making a paste out of baking soda and warm water, slathering it on the contacts, and waiting for a while. Then, I wiped it off, and then used a metal tool to scrape off what I could until I could see the contacts shiny again.Make sure every part of the metal that will come in contact with the arm is shiny to prevent spotty operation of the pump.


Surely enough, when I tested it now, the pump motor ran strong and smooth.

Now, all I have to do is wait for my new seeds and we'll start the next generation of indoor gardens!